April 20, 2010

Waterloo Weekender

Barry Hilton hosted the first REPUBLIC TO EMPIRE weekender over the... err... last weekend. Kind of a mini convention where he booked a hall in a hotel and the participants payed a fee that included room and board. The battle was Waterloo featuring two 6x12' tables of stunning League of Ausgburg terrain and over 2000 pro-painted models. You can read about the build up and subsequent glowing reports from the event on the Fighting Talk forum. The first pics are going up over in the League of Augsburg Gallery and include relevant notes on the action and the rules. Here is one of the first nine shots posted with more to come!


With a bit of further REPUBLIC TO EMPIRE news, Mark Severin of deepfriedhappymice.com has added a very detailed review of the book to his Rules Directory. Very nicely done and Mark actually read the book before commenting on the rules.

More terrain articles are on the way, but real life has intruded on my hobby time as of late and I've gotten precious little accomplished on that front.

April 10, 2010

Terrain for Historicon - Part Three

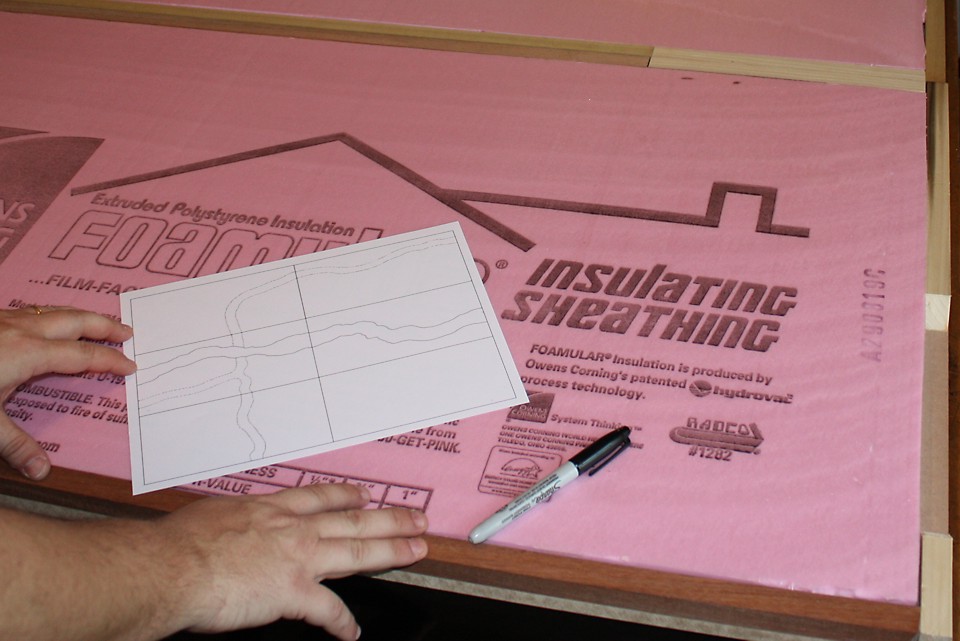
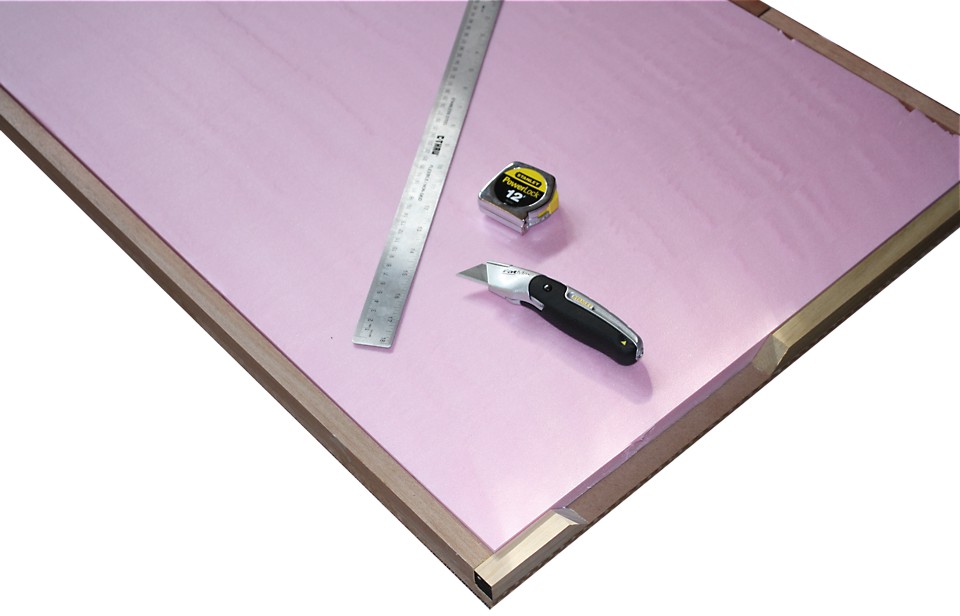
I carefully cut the foam so it fits tightly into my frame and then I drag out my plan and a marker. The first two boards I am going to make include the river boards and one plain board. Using the precut edges as a guide, I draw out my river, including marking the 45-degree angles on the edges. You don't have to get this step perfect except at the edges where it meets the frame. If your river seems to have wandered off course, just redraw the offending part. We're going to cover all of this up later.


It's useful to keep other terrain elements in mind when you include rivers and roads on your boards. If you're not careful, you can wind up with 'dead spaces' that you can't add loose terrain. In my Historicon layout, this won't be a problem because the river is central to the action and I'll have plenty of space, but because these are destined for my own collection after July, I want to make them as flexible as possible. You can see one of my loose hills above (and catch a sneak peek at what the boards will look like in the coming weeks), placed on the board to make sure there might be room for it in a later scenario and different layout. 


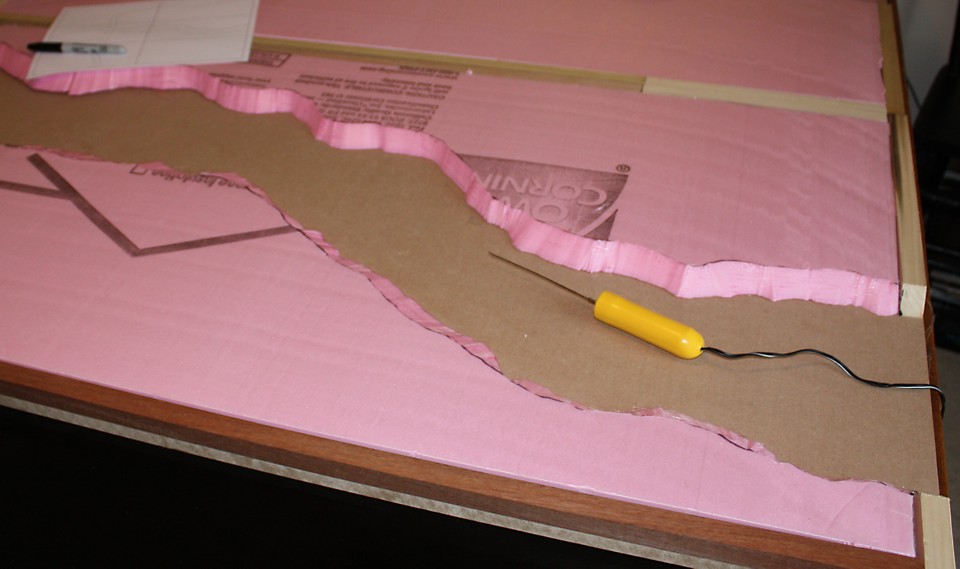
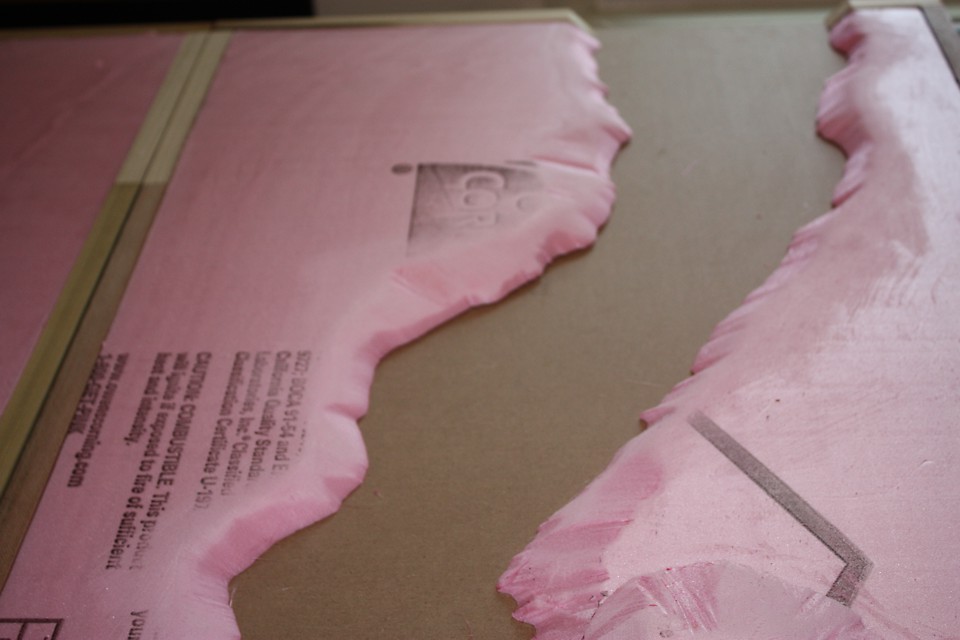
To carve out my rivers for this project, I used a hot wire tool designed specifically for cutting foam sheeting. This is basically a wire attached to a handle that heats up when you plug in the tool. A craft knife would work just as well. With either tool, you want to angle your cuts to give the impression of a slope, again paying particular attention to the ends where the foam meets the frame to get the transition as neat as possible.


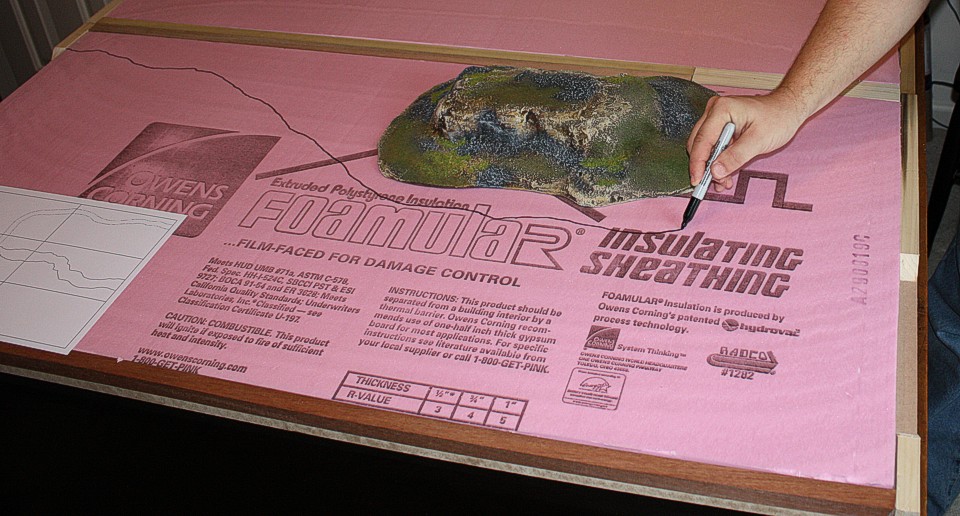
To add some interest to my river bank, I decided to add a small permanent hill. I simply cut out a rough shape with the hot wire, then placed the hill against the bank and carved a little more to make the join as smooth as possible.


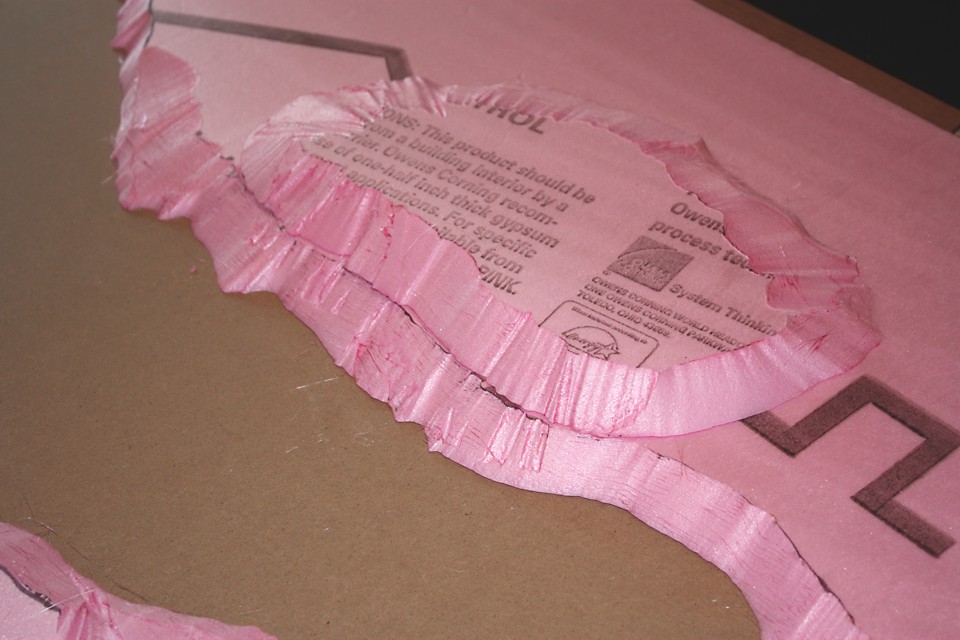
Finally, I use a sanding block to remove all of the sharp edges and create a gentle slope. This is only the work of a few minutes, but it's messy so I recommend doing this in the garage or making sure you have a vacuum handy!  

Now we have to glue everything down. I used Liquid Nails for this project, but a dozen other adhesives would work just as well. You don't have to cover the entire surface. The wooden frame will protect the outside edges and for our river boards, we are going to be gluing some texture that will add more stability to the exposed edges The glue will expand as you push it down against the wood. The pic below is from an older project (and used PVA glue - see, I told you almost any adhesive would work), but the process was the same.


Leave everything to dry overnight to ensure a solid bond. I think it took longer to write about this step than it actually did to do it! I finished all six boards in a couple of hours. In the next post, these things will start to look less like lumber and more like terrain!

April 9, 2010

Terrain for Historicon - Part Two

Been seriously busy the last few weeks and couldn't find the time to post, but here's the newest terrain article.

The last step before adding the foam inside the frame is adding felt pads to the bottom of the boards to protect the surface of your table. These pads can be found at DIY stores, craft shops, and even drug stores. They are basically small felt circles with adhesive backs. As a word of advice, although four pads - one in each corner - would be enough to protect the table, I add another pair in the middle of the long sides and one in the center. I noticed on an earlier project that if you only use four pads, the weight of the board tends to draw the center down and causes the board to sag - not what we want after all of our careful work so far!


After building our frames, it's time to add the foam. I use 3/4" pink insulation foam. This stuff is sandwiched between two thin plastic films that you want to remove. It makes cutting much easier and I prefer that the glue I'm going to be using later adheres to the foam and not the plastic.


I take my time measuring and marking the foam to get a tight fit to my frames - it doesn't have to be perfect, but it will save time later.
Notice the shot above is one of two of my new river boards. I cut the battens at 45-degree angles to make the banks of my rivers with a  miter saw and carefully measure them so they will line up with each other. 


In a couple of days, I'll put up part three where we draw out the rivers and cut the foam to make the beds. I've already got the shots, but I've run out of typing time!


April 2, 2010

Perry Dragoons

Yesterday I arrived home to find a package on my doorstep from Nottingham - two boxes of Perry Brothers Dragoons! The first thing I noticed is these kits are packed! There are enough sprues to build 13 mounted dragoons, 8 dragoons on foot, and 6 casualty figures (3 French and 3 British)...

There are enough spare heads to make a six model elite squadron in helmets or fur caps. Of course there are enough bits to make an officer, eagle bearer, and musician. The separate heads and right arms will make assembly slightly slower than some of their kits, but will give you a wide variety of poses to make a very dynamic unit. The foot dragoons come with three different sets of arms - with the combination of two different bodies and again separate heads, you should be able to make eight unique models that would be perfect for those Sharpe-style skirmishes.

These are great models. I am a huge fan of multi-part plastic minis and have been very happy with the releases from both the Perrys and Victrix. My only gripe with this kit is that the models are in 1812 uniforms and it's doubtful many of these new uniforms found their way to my favorite theater in the Peninsula. Now, since I'm the guy who used Victrix early French to make a couple of  'close enough for me' Spanish battalions for my collection, that's not going to stop me from adding a couple of regiments to my 1810 French army. If I have the time to paint them, I plan to add a couple of squadrons of these models for my game at Historicon.

More terrain stuff is on the way in a couple of days...