June 28, 2010

Over the River...

More terrain for Historicon! In fact, the bridge is the central focus of the scenario and the side with uncontested control of the crossing at the end of the game is the winner!


This was a bear to construct for the simple reason that I wanted the arches to meet the river banks. Since the bridge is not a permanent part of the board, that meant each end had to be carefully cut to match the bank. The natural slopes are not symmetrical, so each point that rests on the shore is cut at a different angle. Had I simply constructed a 'flat' bridge, it would have been much easier since it would just sit atop the banks.

I mentioned a few posts back that the Spanish had attempted to destroy the bridge, so I modeled it with a chunk blown out and timbers thrown across the gap. I debated leaving the timbers as loose and building the placement into the scenario, but decided against it in the end. Crossing the planks will be treated as crossing a liner obstacle so troops trying to force the bridge will face the additional trouble of being slowed down (as if the guns overlooking the bridge wouldn't be trouble enough).

Time is flitting away, with about ten days before I head north to meet Mr. Hilton at the airport. All of the terrain for both scenarios is finished. I am putting the finishing touches on the French 82nd Line's bases. The only troops I have left to paint are a ten skirmishing voltigueres, a mounted French brigadier, and three British riflemen. If I have the time I want to paint a handful of Spanish villagers and some livestock to bring the village to life.

June 21, 2010

Spanish Village

Almarez was too far away from the bridge to actually be represented on the table, but I wanted to add some more character to the battlefield. I also view designing the table much in the same way I would view a composition of a painting, so I didn't want my abbey to be the only structure on the board. Having a few more red roofs will pull a viewer's eye around the 'canvas' and make for a better display!

I've wanted to add some simple Spanish buildings to my collection for a long time and building the table for Historicon finally gave me the push to get it done. All you really need to represent a small village are a couple of buildings and maybe a few walls and/or a field. That's large enough to shelter a model battalion and when we consider the unit is supposed to be around 600 men, we actually have a decent sized settlement. There is a lot of discussion in REPUBLIC TO EMPIRE about ground scale and terrain so that's really all I'm going to go into here.

I prefer to make my buildings from scratch, with foamcore, plasti-card, mat board, and balsa wood, though I'm not above scavenging windows from model rail-road houses and other details, such as the ready-made tile roof from Plastruct! Here are before and after shots of the three buildings I made for this game...


The models have been designed without bases so I can place them edge to edge as seen here or scattered. I have plans for another three or four buildings, but that will have to wait until after Historicon! The bridge construction is finished and awaiting paint, but I've still got a dozen Voltiguers to paint, several units to finish the bases on, and some projects to do that involve BENEATH THE LILY BANNERS!

June 17, 2010

The Battle of Almarez, August 6th, 1809

The British won the battle of Talavera, but were forced to retreat all the same as French reinforcements arrived. The British formed a new defensive position behind the river Tagus. All of the crossings were well defended, but that might not have been the case if Marshal Soult had been more decisive. One crossing near the village of Almaraz was held initially only by a force of 1000 Spanish Line Infantry and a small detachment of guns. The bridge across the river is described as "broken" but it was apparently still passable by foot. There was also a ford nearby.

Historically, Wellesley had four days to prepare his defenses and he positioned General Craufurd and his Light Brigade to reinforce the Spanish. At this time, the Light Brigade consisted of the 43rd, the 52nd, and the 95th. He also attached Donkin's Brigade to Craufurd, though this brigade had suffered heavy casualties at Talavera, loosing around a third of it's strength (read 24-man battalions rather than 36). This brigade included the 87th (the Prince of Wales' Own Irish) and 88th (Connaught Rangers) line as well as a handful of the 60th (more riflemen, this time with red facings). Soult dispatched Marshal Ney (finally) to take the crossing, but Ney found it too well defended by the time he arrived.

But what if Soult had been more decisive or Ney was able to pull off one his famous night marches and the French could arrive before the British reinforcements? Say the allies start with only two Spanish battalions and a weak battery of guns on the board when Ney attacks with elements of the Sixth Corp. The British reinforcements would arrive during the game.


This is the scenario Barry and will be running for Historicon. The forces are listed below and have been modified both to meet my collection (the 75th and 45th substituted for the 87th, etc) and to provide enough units for a multi-player battle, though the organization may be modified depending on how many players and commands are needed...

Third Division, Craufurd

Light Brigade
43rd Light (30)
52nd Light (30)
95th Rifles (30)

Donkin's Brigade
88th Line (36)
74th Line (24)
45th Line (24)
60th Rifles (12 skirmishers)

Attached Cavalry
1st KGL (12)
RHA battery (2 guns)

Spanish Brigade
2 Battalions (24)
half battery of foot artillery

Loison's Division Command by Marshal Ney

First Brigade
26th Line (2 battalions, 36 each)
Legion Hannoverienne (2 battalions, 30 each)
Legion du Midi (24)

Second Brigade
32nd Light (24)
66th Line (2 battalions, 36 each)
82nd Line (30)

Attached Cavalry
5th Hussars (12)

Divisional Artillery
1 battery (4 guns)

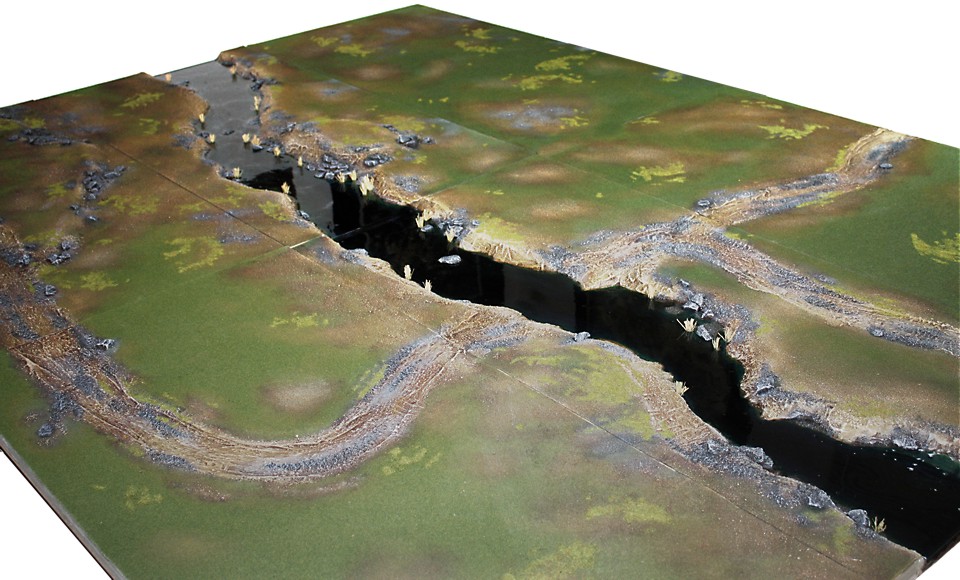
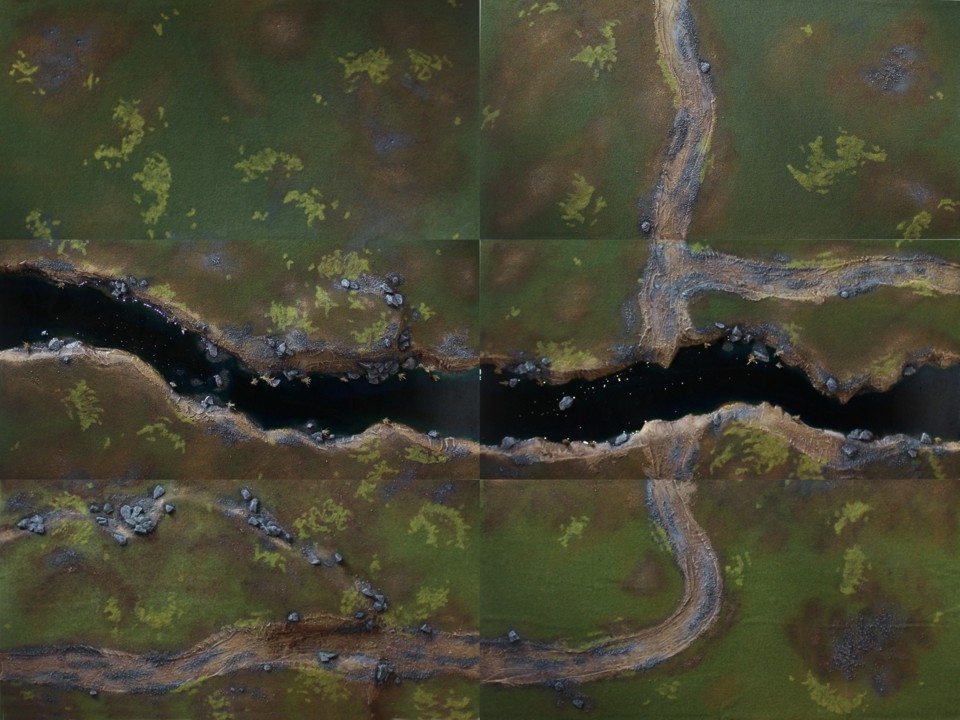
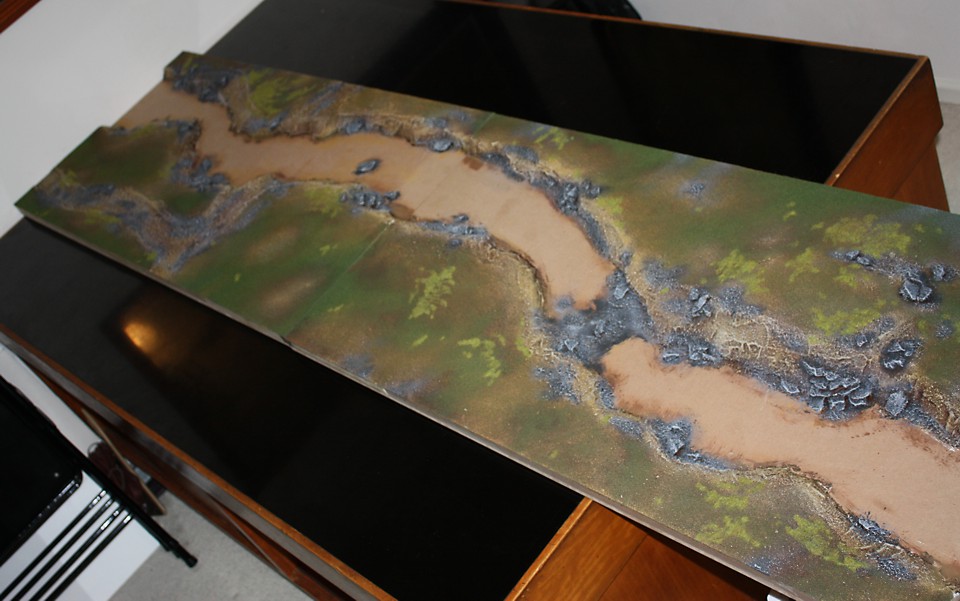
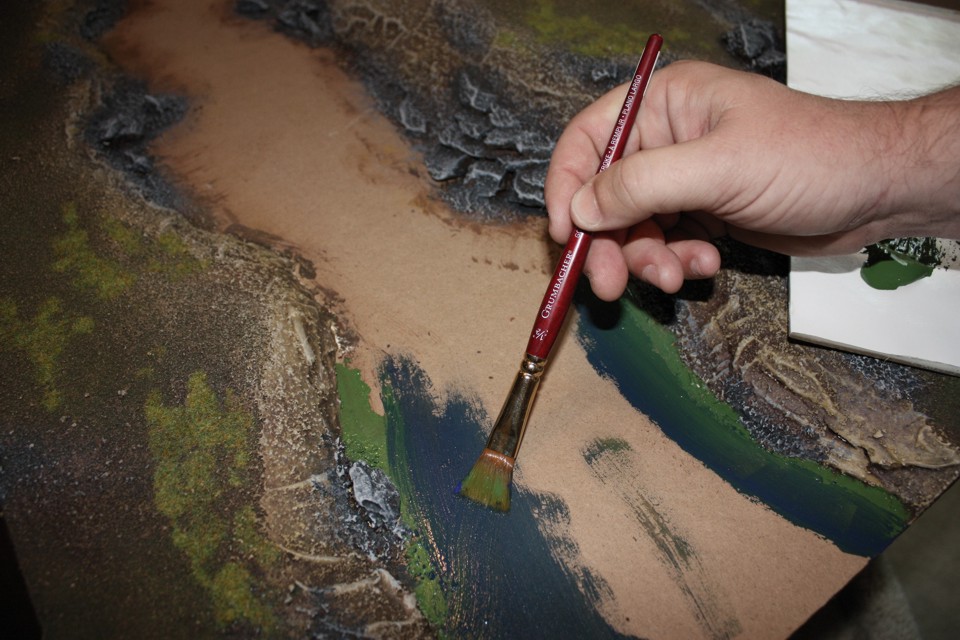
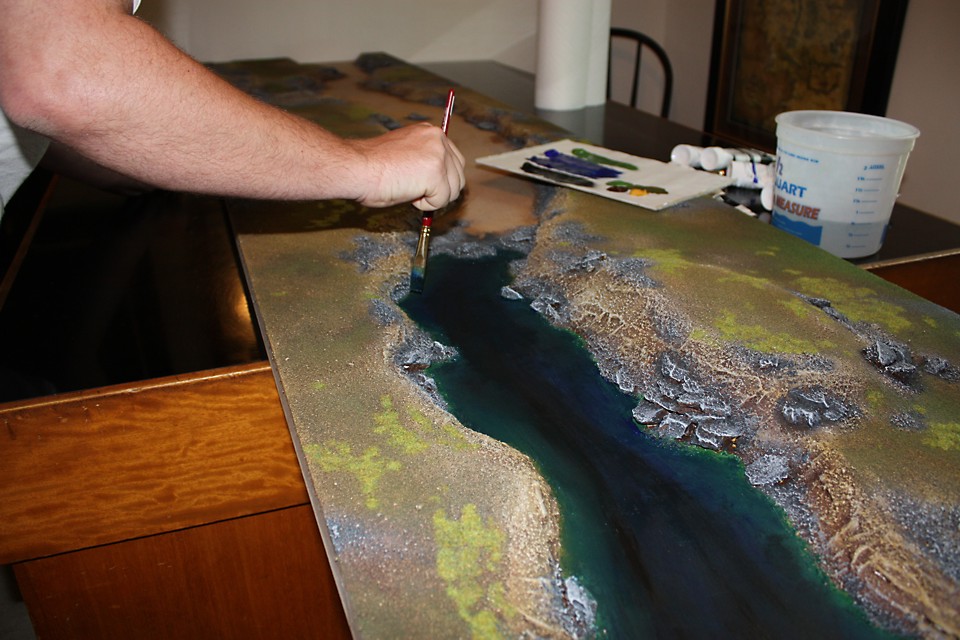
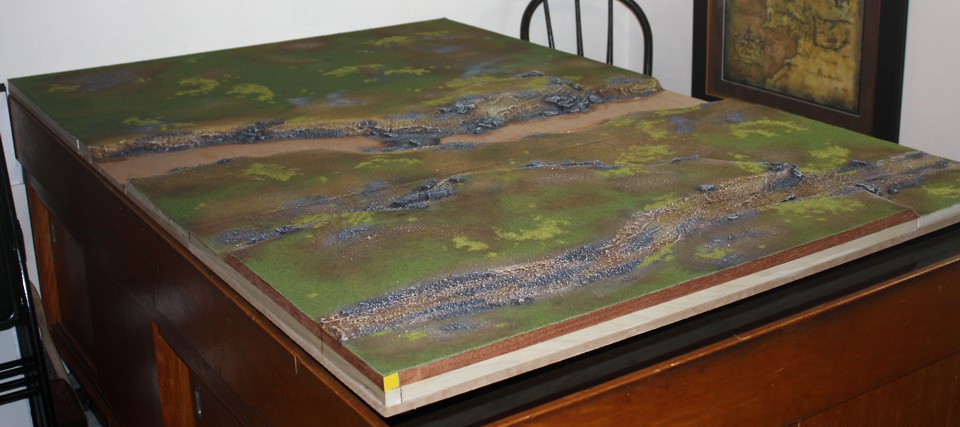
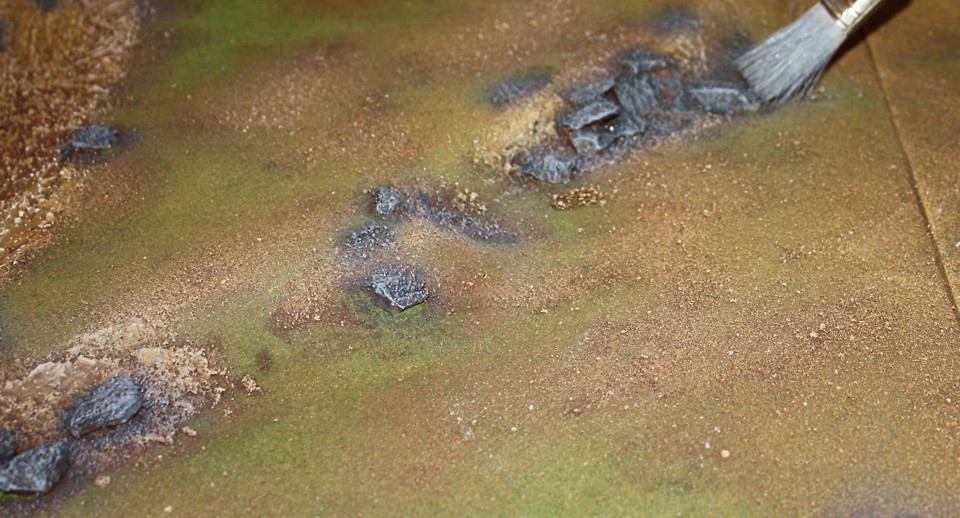
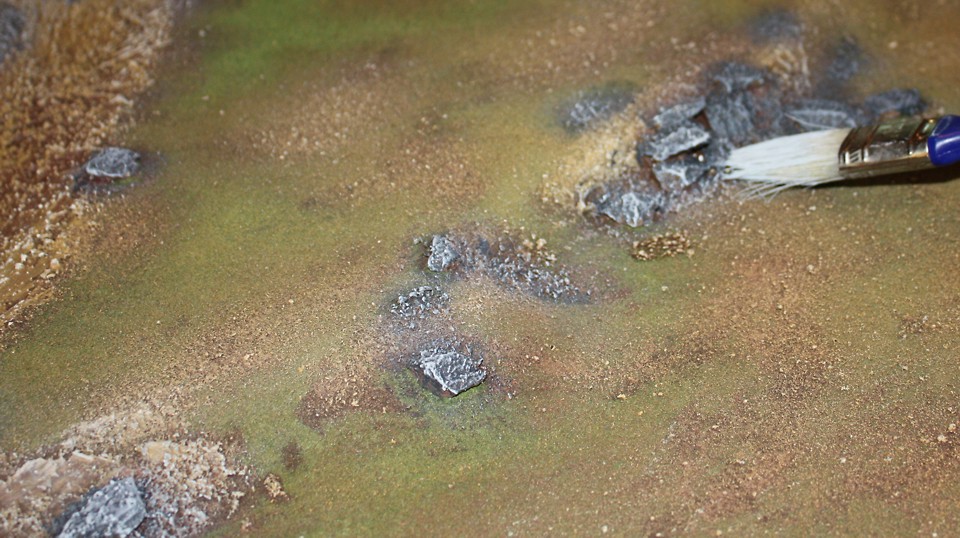
The rough terrain board layout and is based on a map of the location that depicts the site of a raid on the same area in 1812. Fort Ragusa and the redoubt at the bridge would not have been there in 1809, but the structure on the hill south of the river would be there. The crown of Cerro del Tesoro (Treasure Hill) was the site of the Our Lady of Waters Hermitage. During 1808 and 1809, both the Spanish and French occupied the area and the hermitage was most likely destroyed during the fighting. The Spanish built a strongpoint on the hill in 1808 and the French expanded it into what became known as Fort Napoleon. The Spanish strongpoint can be the abbey I already own (R2E pages 63 and 69) and can be the site of the Spanish half battery (By the way, there is a complete step by step article on the construction process for this model in Battlegames 18).


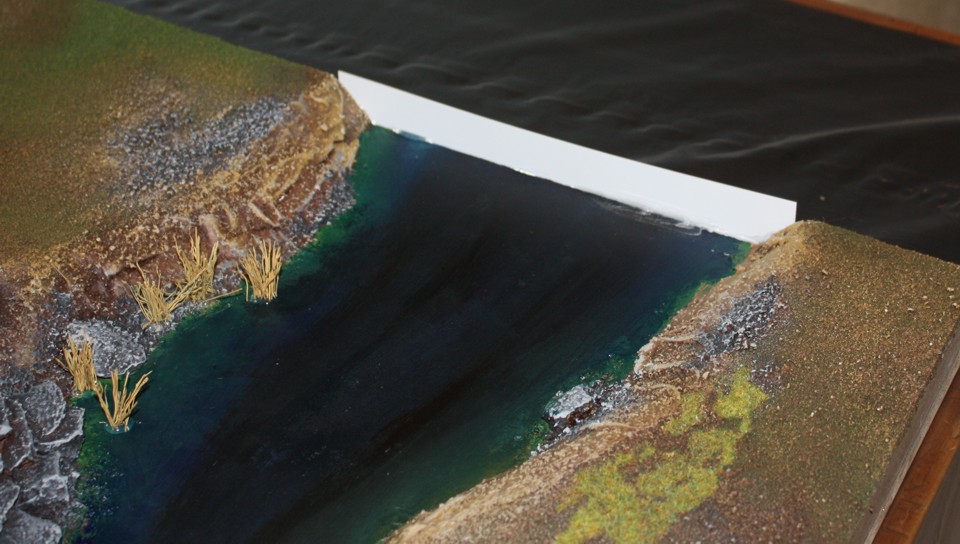
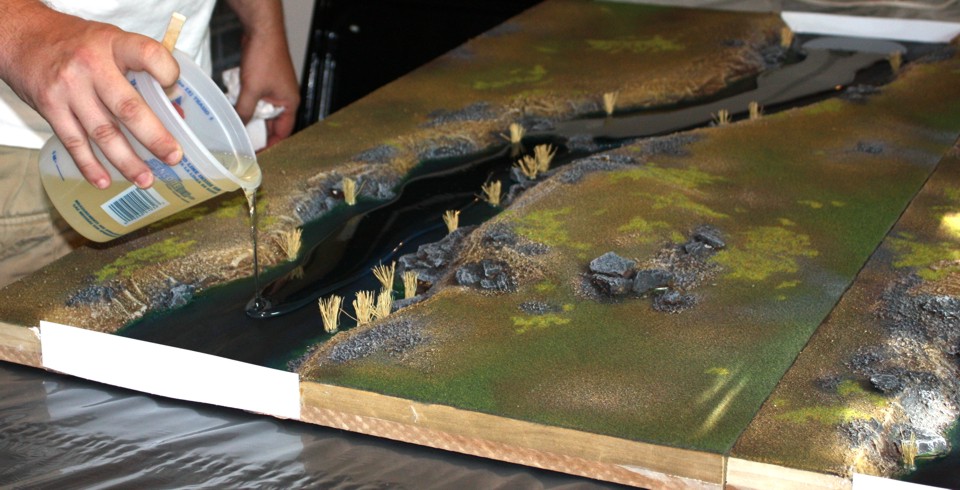
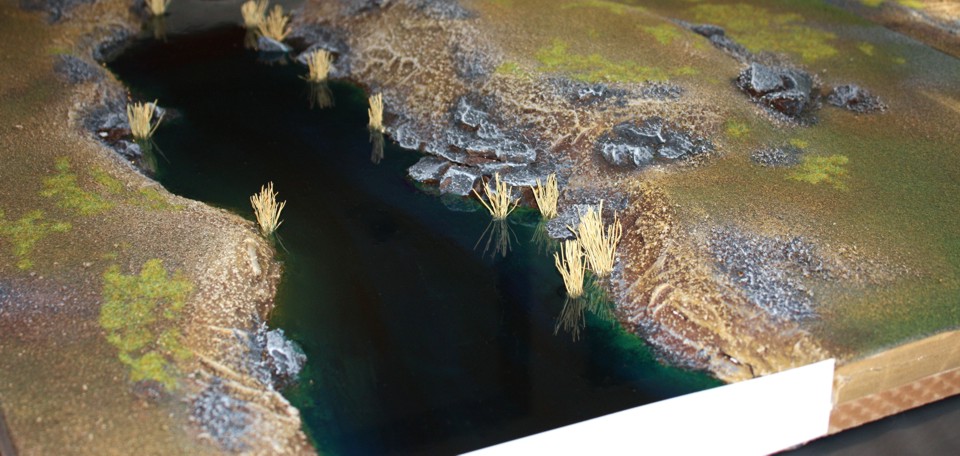
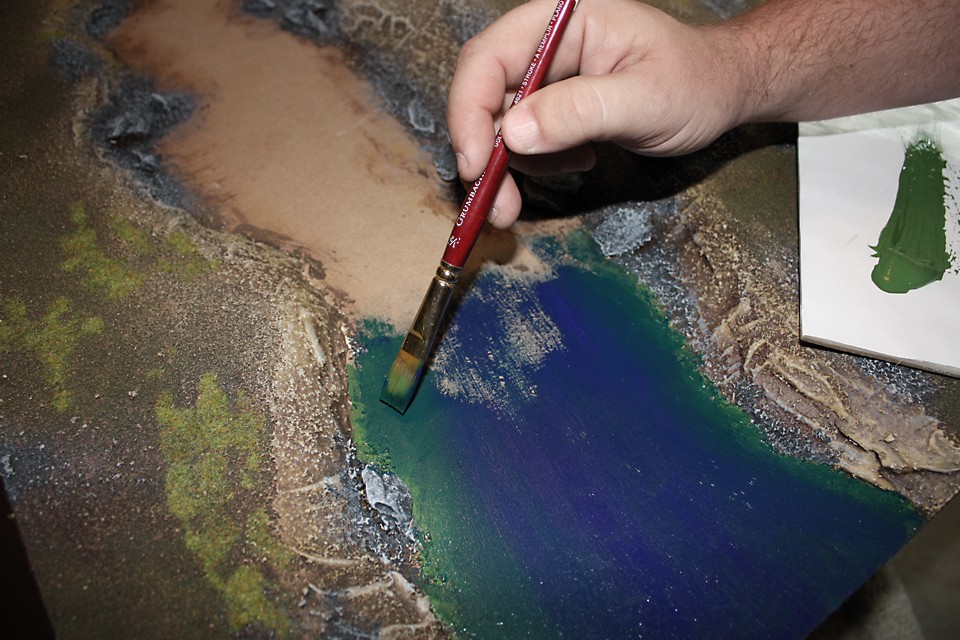
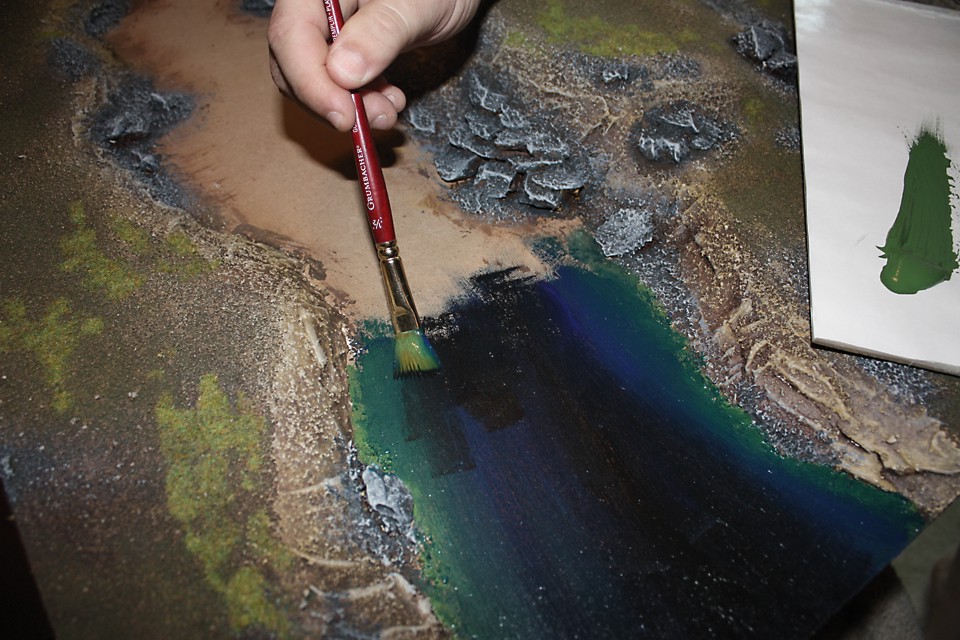
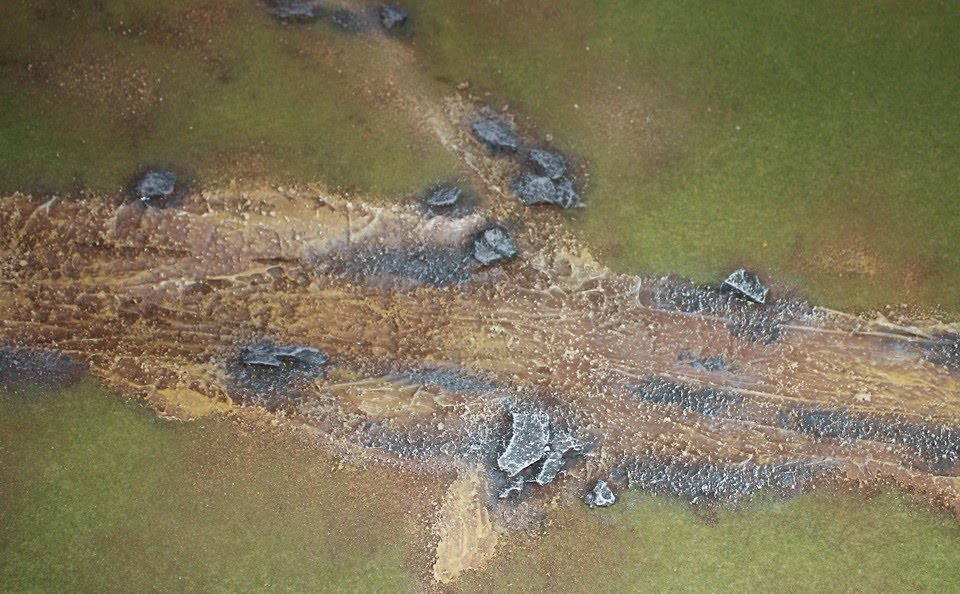
The Tagus was quite a substantial obstacle during the Peninsular campaign - details from the 1812 raid mention a pontoon bridge 200 meters long (the object of the raid) which would work out to a little over 19 inches! I think in true wargame style, making the Tagus 10 to 12" wide would still look imposing without eating up too much table space. The ford was to the east of the bridge, but though it's existence was known by the French in 1809, it's location was not. The ford was four feet deep and apparently could not be spotted simply from the banks as Oman mentions French hussars failing to find it for several days. Again, depending on the number of players, the ford may be known at the beginning for game purposes so as many people as possible can get in on the action.

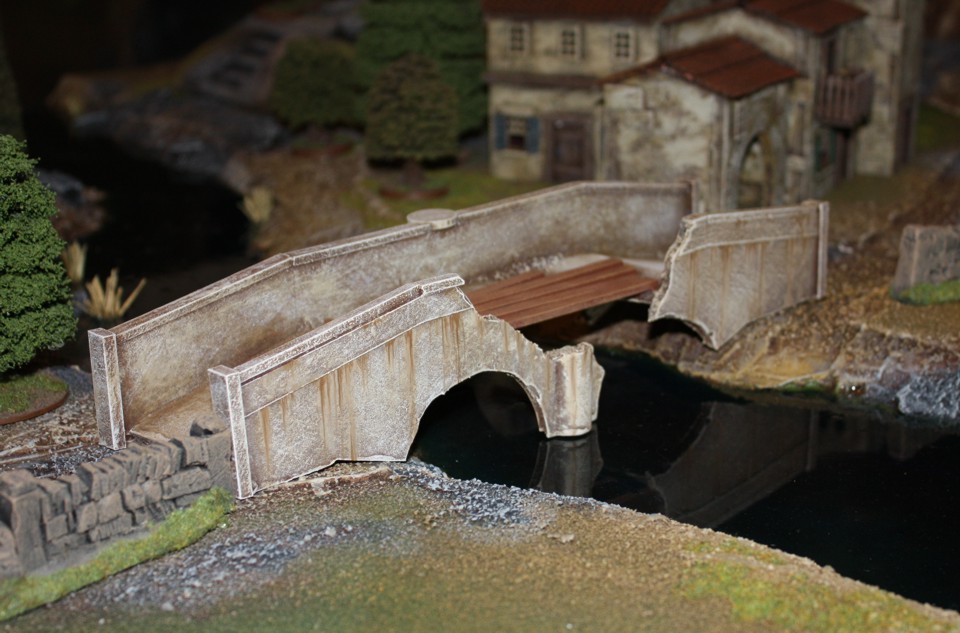
The Almaraz Bridge (known by locals as the Albalat Bridge)...


Historically, accounts say the bridge was destroyed by the Spanish, but apparently foot traffic was still possible (maybe by planks laid across the gap or maybe it was only missing a chunk that prohibited guns and baggage trains - not sure). Since I don't plan on making the bridge a permanent part of the river board, I can't copy the bridge exactly, but I can mimic the style of the arches, etc. I have also modeled the bridge with a chunk blown our of it and planks across the gap.

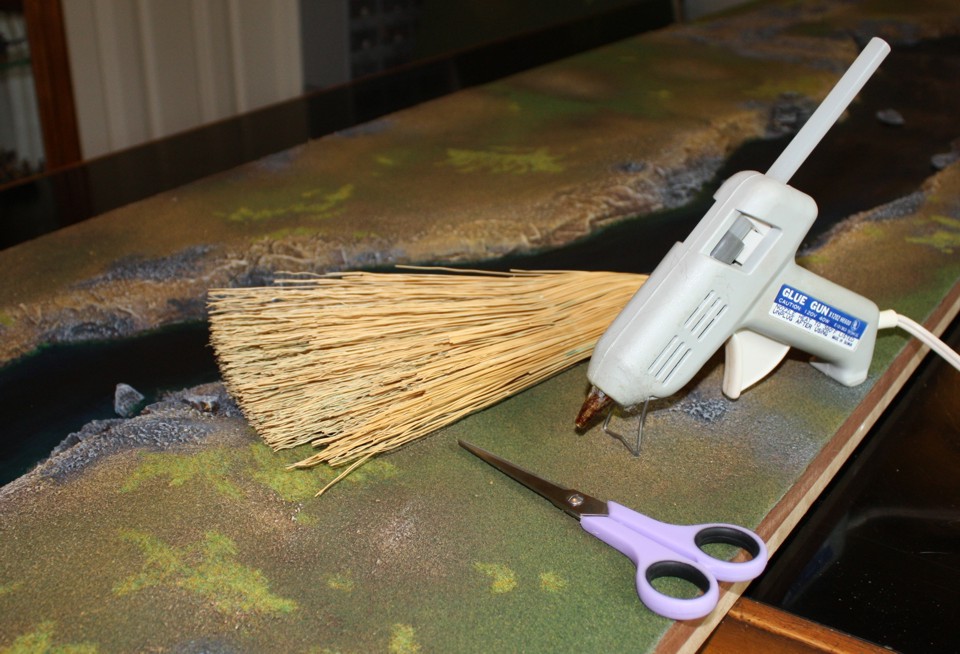
The village of Almaraz was several miles to the north and not really needed, but I modeled a few small cottages to stick in out the way spots for atmosphere. Again, the exact details will be modified on the fly to preserve game balance. I don't normally worry about having perfectly balanced forces, but the object of this game will be to introduce the rules to many people who have never played REPUBLIC TO EMPIRE and give as many people a chance to throw some dice as possible.

June 9, 2010

The Battlefield

Sans all of the loose terrain that will go onto the board, here are a couple of shots of the finished set...


Ok, I've had enough fun... back to painting French infantry!

June 8, 2010

Terrain for Historicon - Part Twelve

And here... we... go!

Last part of this tutorial and my construction of the game table for Historicon is finishing the river. There are lots of different methods and a quick Google search will turn up all of them. The simplest method is probably to brush on gloss varnish, but it requires multiple coats to get good results. My favorite medium is a 'pour on' varnish that is like adding 60 coats in one shot!

There are many different brands available at hardware stores (mine seems to carry a different one every year) and there are commercially available 'water effects' for modelers that work much the same. They are all two-part epoxies that are designed to be mixed and poured onto you surface - the one I used this time around was from Parks. If you use one of these kind of products just follow the directions that come with it. The main thing you want to do is make sure the two parts are mixed thoroughly or the mixture can dry tacky.

To keep our super-cool pour on river from pouring right off the boards, we have to dam the ends. I put a bead of hot glue on the edge of the board around the end of each river and slapped a piece of plasticard to cap off the river. It will form a waterproof seal and after the river dries, you will be able to pop these off and peel away the hot glue.


Now comes the cool part! After mixing the epoxy, all you have to do is pour the mixture onto the river bed. Avoid pouring directly over rocks and reeds. This stuff will flow into nooks and crannies and you can use an old brush to pull it into any area that it misses. At the early stage, you won't harm the finish by dragging the brush through it - after a minute, you won't be able to tell you touched it.


That's it! Finished. I'll have more pics of the completed boards in the next week or so, including the whole table if I can manage find room to set it up and the loose terrain that will finish off the table for the Napoleonic scenario. Hopefully this has helped anyone who is contemplating building their own terrain. If there are any questions involving techniques, materials, or anything else feel free to post them here or contact me at clarence@quindia.com.

June 6, 2010

Terrain for Historicon - Part Eleven

Everything is finished except for the river! I'll present this in two posts because there are a lot of photos.


I used artists acrylics to paint the river. Water has no color of it's own so it's tough to know what to use. Bodies of water reflect what's around them so large bodies are often seen as blue because they reflect the sky. Rivers may also appear green, brown, or gray depending on the terrain, time of day, etc. I want my river for this layout to seem deep so I'm going to use very dark colors.

I work on short sections at a time, because it's important to blend as you go. The first step is to paint the river edges near the shore. I used green because my earth tones have a warm, almost yellow tone and the submerged land near the shore would appear green (yellow + blue = green). The flash reacts with wet paint in the photos and everything appears far brighter than it really is. I actually vary this first color, blending the green alternately with ocher or brown to add some variation.


My second color is a bright blue and I basically use this to blend the green toward the center of the river. The third color is a very deep blue and this is worked across the whole river. The wet paint on the edges blends to make a smooth, natural look. Finally I use black, starting in the center of the river, but I work it all the way to the edges. This mutes my other colors and again softens all of the blending.


It is difficult to describe the technique, but if you practice on a scrap piece of board, you'll soon have the hang of it. The main thing is to keep the center dark to give the illusion of depth.

Ok, nothing says 'water feature' like reeds along the bank! I'm going to model these with an old wisk broom, a pair of scissors, and my trusty glue gun. basically you pinch a cluster of bristles, cut them from the broom, and stick them into a dab of hot glue. You only have to hold them for a moment or two because hot glue dries extremely fast. These will be very strong when the glue dries and you can trim them back with scissors if they turn out a little too long. You can really go to town with this and turn the bank in a marsh, but for my purposes they are just for detail and I simply scattered a few for added effect.


Next time, we're going to do the last step and these things are (finally) finished!

June 5, 2010

Terrain for Historicon - Part Ten

Before painting the river, I want to add a little more detail to the grass areas. I want to add patches of static grass in areas not only to add yet more colors, but more textures. You can also use this step to cover up any rough looking areas caused by poor drybrushing, wrinkles in the felt mat, or any other offensive areas of the landscape! Besides, all of my models are based with static grass and adding it to the board will make them look more at home!
 
It's pretty much like adding rubble. I spread a little glue in the areas I want the grass, sprinkle it on, let it dry, and remove the excess with that risky vaccuum. The trick here is to stipple out the edges of the glue to get a more natural transition between the static grass and the surrounding terrain.


The last shot is the 'north' half of the battlefield, completely finished except for the river, which I hope to complete tomorrow (with pics up in a few days)!

June 3, 2010

Historicon Game Update

https://www.hmgs-crs.org/homeQuick note: If you're planning on attending Historicon and want to sign up to play in one of our games, you may want to register soon. The Thursday REPUBLIC TO EMPIRE game is 'sold out' but there are still spaces available in the Friday and Saturday games. For BENEATH THE LILY BANNERS, there is one slot open on the Friday game and three slots open on the Saturday game, but Sunday is also 'sold out'!

June 1, 2010

Terrain for Historicon - Part Nine

Time to start adding details. The boards are perfectly acceptable as they are now, but this is Historicon and my table will be for a League of Freakin' Augsburg game - the name is renowned for putting on great looking games since I started reading Wargames Illustrated in the 90's! Quindia Studios is on the bill too, but no one will really know who I am unless they read this blog!

Anyway... I wanted to add some more color to the board to break up all of the green and brown so I painted the rocks and assorted rubble I added earlier (Waaaay back in Part Six) in gray tones. The exact colors don't matter as long as you have a dark, medium, and light gray (or can mix them).

The first step is to pick out all of the areas in the dark gray. All of the paint is applied in a stippling or dabbing motion to create uneven edges. We want the gray areas to blend into the surrounding areas.


Next we are going to drybrush on the middle gray tone. I realized I throw around techniques and if you are new to modeling you may not know what I'm talking about so let me take a second to explain 'drybrushing'. Basically, you want to dip your brush into the paint - don't load it up, maybe just cover a third of the bristles. Then wipe the brush across a paper towel/paint rag/whatever until most of the paint seems to be gone...


Now back to the middle gray - lightly draw the brush across your textured surface and you'll see the paint is transferred to only the highest points and sharpest edges. We want the first color to show through. I did this repeatedly in Part Eight, but I didn't really explain it. Hope that helps if I confused you. Feel free to ask questions if you're still stumped! By the way, this technique will ruin your brush so keep a few old ones hand for dry brushing.


The last part of this process is drybrushing VERY lightly the... err.... light gray. For me, one brush load did three boards. This makes these details 'pop' and really finishes off the rocks.


Next time we are going to add one more layer of color and texture...